In this chapter you will create a website prototype to help market your iPhone application. Your prototype will become part of the Class App store. Other students will be able to review and purchase your app online. We are going to build a store together—so let’s get started!
Like the iTunes store, our class store will have separate pages describing each app offered for sale. Those pages will include screenshots of the apps—the same screenshots that you produced with MockApp. Each student developer will make his or her own page and then link that page to the store.
Once all the pages are linked we will have a shopping period during which we will “buy” each other’s apps. We will capture the sales data to see which apps are best selling and highest rated.
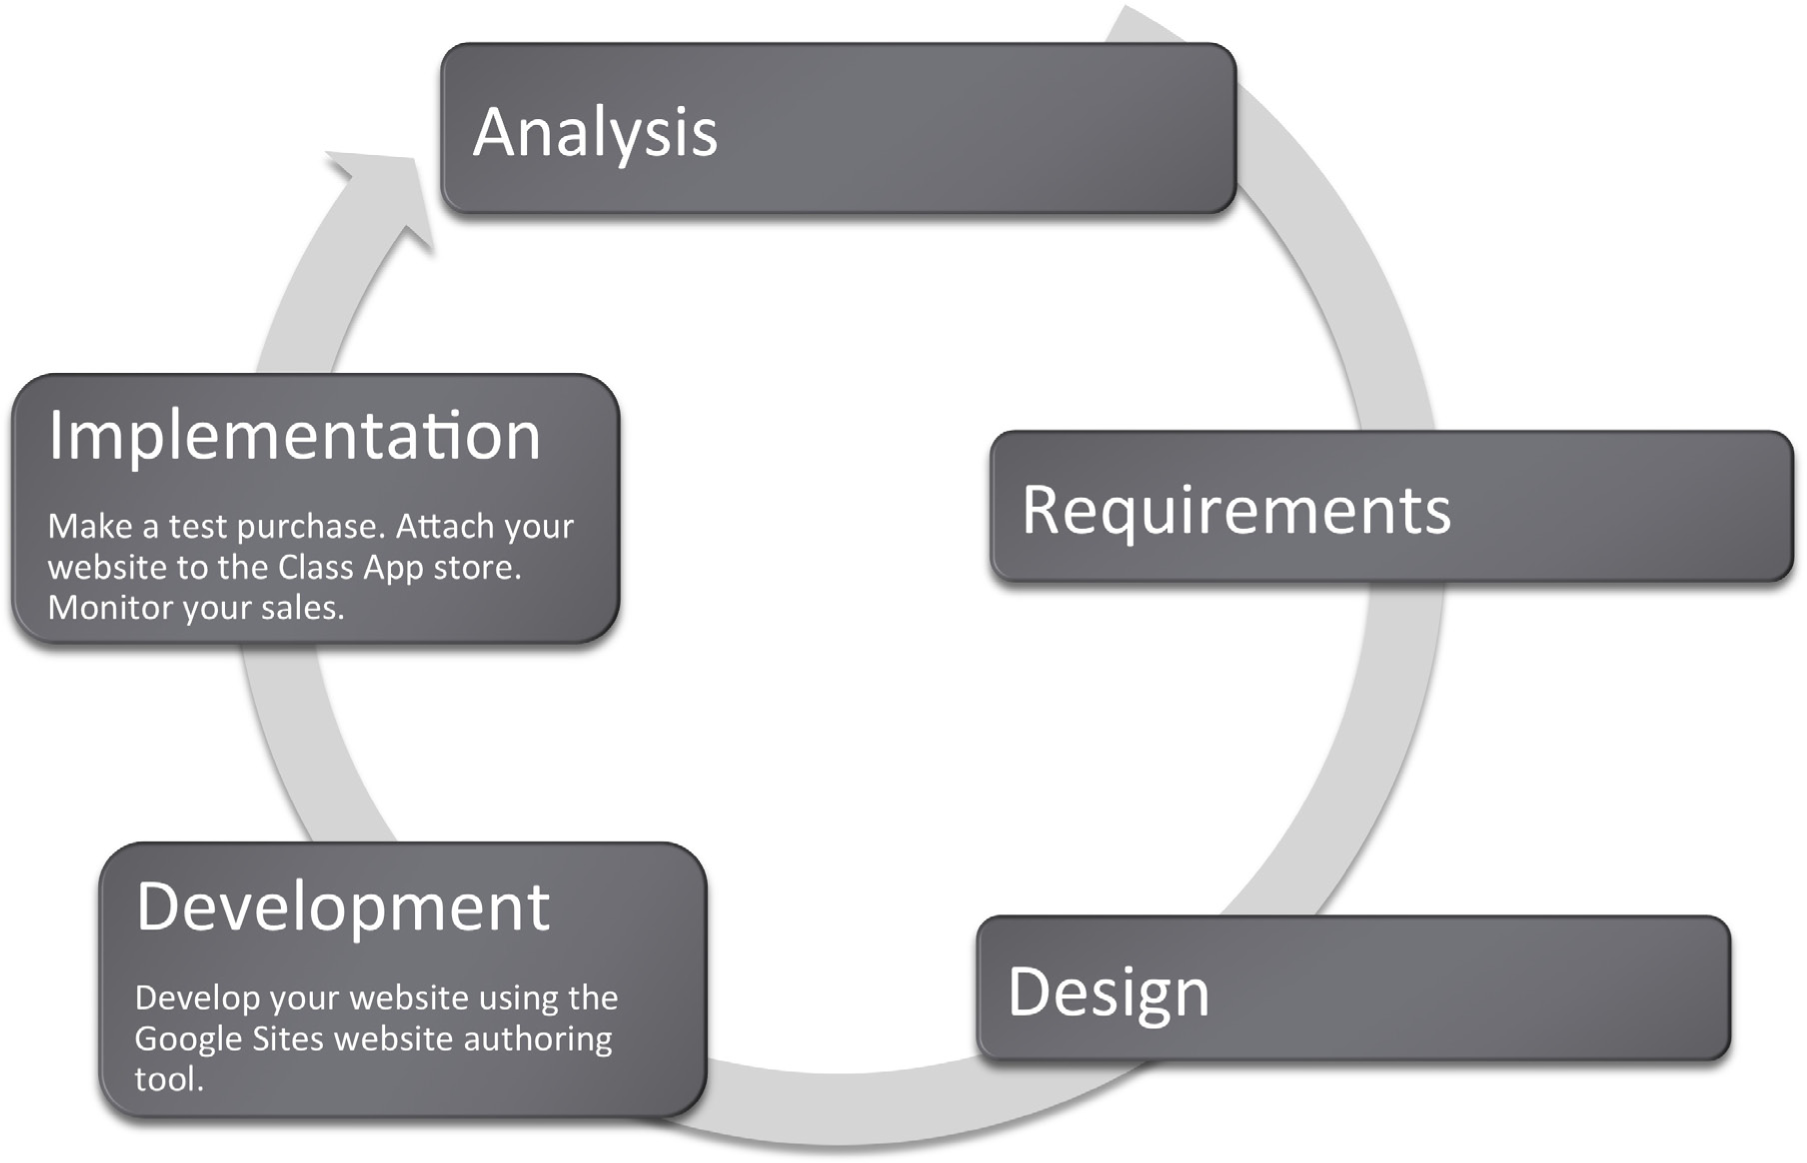
Many information systems projects are conceived of in a life cycle that progresses in stages from analysis to implementation. The diagram below shows the stages that we touch in the current chapter:
In the design chapter we talked about how important it is for us to standardize the look and feel for each page in our store so that it indeed looks like a store and not a loosely affiliated and somewhat bizarre collection of pages. However, it is also important that we standardize the development platform so that our store operates seamlessly.
The corporate world tends to be conservative in choosing information systems solutions. In fact corporations usually like to standardize to preserve the brand image and to ensure reliability and ease of maintenance.
Our classroom corporation is no different. Since we will be developing on online store together, it makes sense for us to agree on a common look and feel for each page in the site as well as a common platform for development. Our common platform is Google Sites and your professor may also require that you use a specific theme family on Google Sites to preserve a common look and feel.
Corporations such as Amazon.com have a clearly established corporate identity, which appears on every page. They use an orange and blue color scheme and consistently place navigation elements. Amazon uses a proprietary development tool since they are an industry leader.
Why is standardization so important? Consider that if you create something wonderful in a cutting edge authoring tool and then leave, no one else will be able to update the site you created. More often than not this is exactly what happens when students create websites for small businesses. The business has no way to update and maintain the site in response to business needs. Concern about site maintenance is one of the reasons that businesses are hesitant to engage students to create their websites as a class project even for free.
If given a choice between features and standardization, corporations will almost always choose standardization. We see this in other arenas as well such as office productivity tools. Corporations often mandate that everyone use the same word processor and even the same version! Students are often surprised when they arrive at the workplace to find that corporations live one or two versions behind on word processing software. Every upgrade represents potential costs in software, hardware, training, and lost productivity during training. Unless there is an overriding benefit to be realized, corporations will often choose to avoid the cost. In sum, corporations tend to be very conservative when it comes to software choice.
The corporate world is also happiest when there are clear market leaders to choose from. The last thing that a corporation needs is to invest in software from a company that later goes out of business.
You might well ask why we are building a store rather than using off the shelf software that performs store management. The bottom line is that we want you to get under the hood to see how an information system functions—particularly how it interacts with a database.
Nonetheless, the first decision that a developer needs to make is whether to build or buyThe classic decision on whether to program or purchase an information systems solution. It is usually better to buy. a solution for the business problem. To build means creating a customized solution; to buy means purchasing an off the shelf solution. The rule of thumb here is that if your business is similar in nature to thousands of other businesses, then you should buy a pre-built solution. There is no point in reinventing the wheel.
Off the shelf solutions tend to have a number of advantages. They anticipate functionality that your business requires and they are thoroughly tested. Most systems can be further customized to meet the needs of your business. From a support perspective, not only do you have customer service from the company that developed the solution, but you also have a user community that shares tips and tricks. Furthermore, as new versions are released you can improve the functionality and acquire bug fixes for your website with relatively little additional cost.
There are off the shelf solutions for almost any industry you can imagine—from doctor’s offices to construction companies. And the market is competitive, which helps drive down prices. Rather than hire a programmer, many businesses choose to adopt off the shelf solutions. Many of these off the shelf solutions live in the cloud so that the business does not even need to have a server in their office—only workstations to access the data in the cloud. For example www.curvedental.com is a cloud solution for a dental office.
The major disadvantage of off the shelf solutions is that they are limited in how far they may be customized.
If you do choose to build a customized solution from scratch, you still need to choose an authoring tool. Ideally, you want a tool that has some pre-built features that snap together much like Legos. We will employ a user friendly tool provided by Google called Google Sites.
Because this is an introductory course we want to avoid writing programming code. Fortunately Google Sites is sophisticated enough to allow us to avoid code view. However, we should understand the relationship between what we see on the screen—design view—and the underlying code.
Every webpage is constructed from HTML code. Professionals go to great lengths to refine that code for optimal look and performance. Most professional sites use a suite of products to prepare images for the site, to manage code on the site, to keep the pages organized, and to integrate with the backend database.
Adobe is probably the leading vendor of professional website authoring toolsPrograms that greatly simplify the process of building a website. Google Sites is the authoring tool that we will use.. Many custom built website solutions are authored at least in part with Adobe tools. The following page shows just a few of the many tools available from Adobe in their Creative Suite. The very fact that Adobe packages the tools in a suite is a hint at the complexity involved in creating a professional site.
Professional authoring tools typically have a design viewThe what you see is what you get (WYSIWYG) view of website authoring. The design tool functions like a word processor. and a code viewThe HTML code that is built behind the design view. Most authoring tools provide a code view, though you rarely need to use it at our level. You may have seen some code view on YouTube when they show the code to embed a video in your webpage. allowing the developer to switch back and forth between the two. The design view is much like working with PowerPoint. You drag text and graphics where they belong on the page. The code view allows the developer to edit HTML code for even more precise control or the look, feel, or operation of the site.
However, few beginners ever want to see website code nor pay for the sophisticated code editing features. Fortunately, they don’t have to. A number of website authoring tools have been developed over the years to automate the process of code generation and shield users from code view. One of them, Google Sites, is shown on the following page.
But what if you really need a piece of code to accomplish a specific task? Google Sites created an open platform so that developers can create and publish “gadgets,” which can be dropped into your website. Gadgets are like the prebuilt Lego assemblies mentioned earlier. They snap into an existing site. In fact gadgets are to Google Sites what apps are to the iPhone platform. In the same way that the Apple touts, “There’s an app for that,” for almost every iPhone need, just so Google might boast, “There’s a gadget for that,” for many website development needs. And like iPhone apps, some gadgets provide very sophisticated functionality.
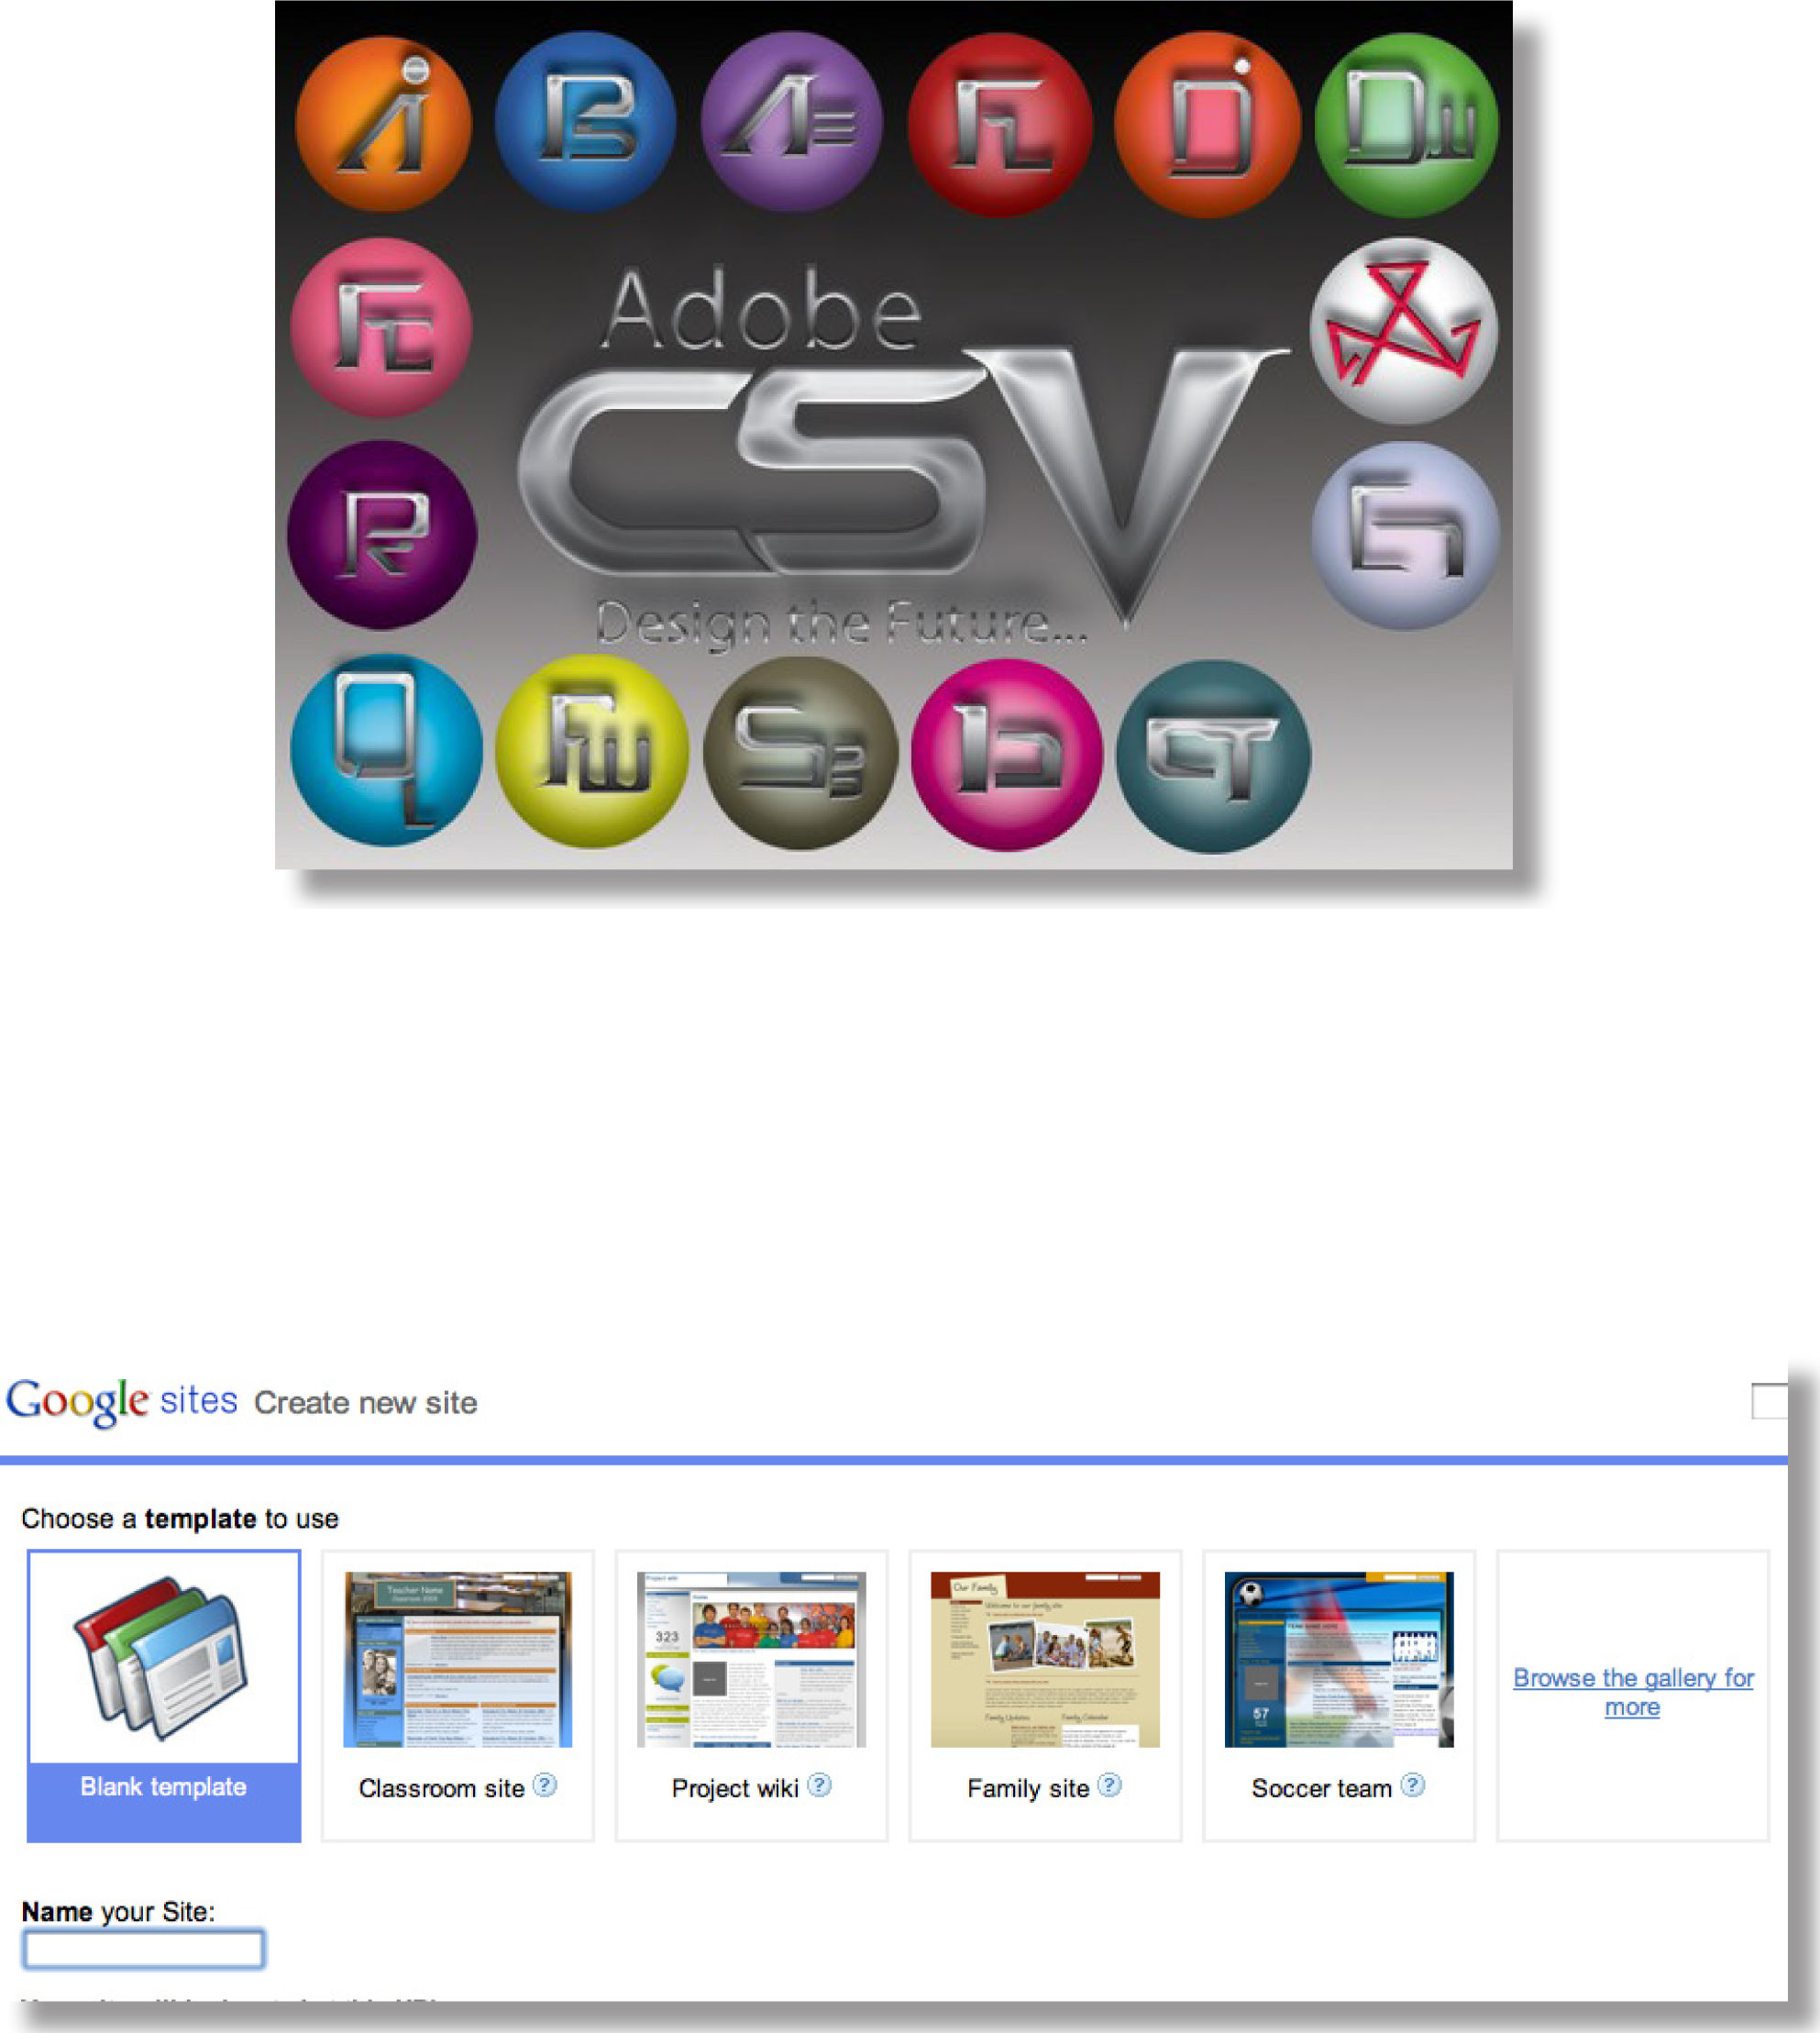
Adobe Creative Suite (above) and Google Sites (below) are both website authoring tools. Creative Suite runs on high powered workstations and is used by professionals who need precise control over the look and feel of their site. Creative Suite is really a family of tools including Photoshop, Flash, and others than work well together. Google Sites is a rapid development solution that lives in the cloud. Control is more limited to template based solutions. Development time is much shorter with Google Sites than with Creative Suite. Adobe product screenshot reprinted with permission from Adobe Systems Incorporated.
Our authoring tool, Google Sites, lives in the cloud. Amateur sites and some small businesses tend to prefer cloud based tools for their low cost and ease of use.
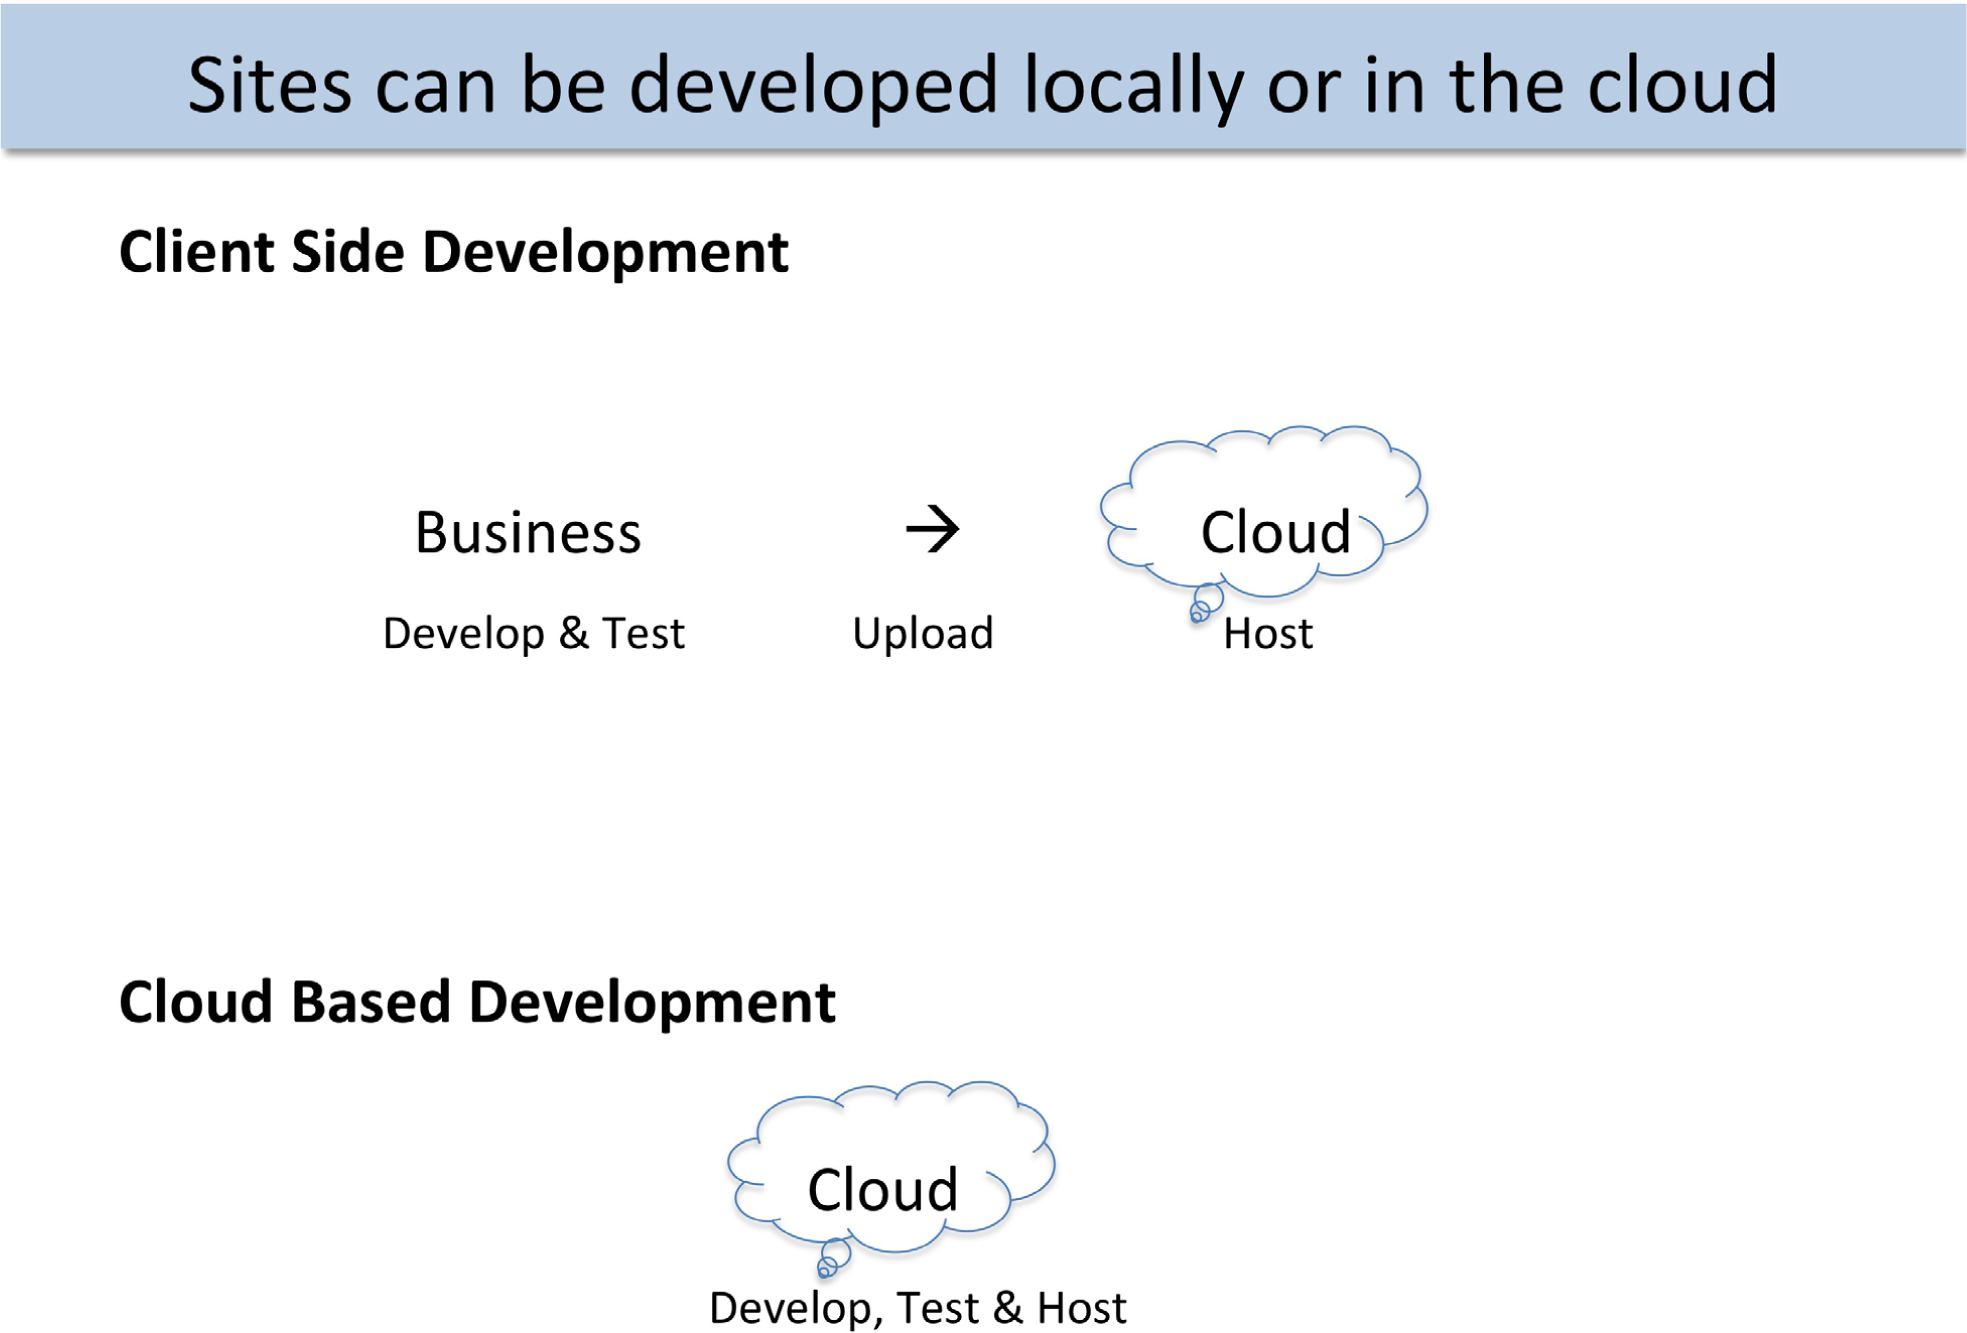
Client side toolkits such as Adobe Creative Suite allow all development and testing to take place offline before uploading to the web server in the cloud. By contrast, cloud based tools such as Google Sites require the development to take place in the cloud. Cloud based tools tend to run a bit slower due to internet response times, but the results are instantly published.
The issue on client sideRunning development software such as Dreamweaver on your workstation. The major advantage is that it runs very fast when running locally. vs. cloud developmentAccessing development software that lives in the cloud. The major advantage is that the development process tends to be greatly simplified. is where the authoring software is located. Client side development takes place on a local computer. Only after the website is thoroughly tested is it uploaded to the cloud for hosting. Almost all professional systems are developed in this way.
There are numerous advantages to client side development, especially for large sites. The developer tends to have greater control over the look and feel of the website. The response time of the computer during development is very quick since there is no delay waiting for a cloud service to redraw the screen. Furthermore, the site is portable. The developer can choose to host it on any computer in the cloud.
Client side authoring tools range in price from free packages such as Pages, which is part of Apple’s operating system, to very expensive packages such as Adobe Creative Suite, which costs hundreds of dollars.
Cloud development tends to have a more template based look and feel. Google Sites is an example of a cloud development tool. The developer has less fine grained control over the look and feel of the website. However, with cloud development it is potentially easier to collaborate and integrate content.
Cloud development tools tend to be free or very low cost. The vendor of cloud development tools recovers their costs by running ads alongside, or even within, your site. In other words, you have no choice but to host your site with the cloud provider. As the page views or business features of the site begin to increase, the cloud provider will begin charging higher fees.
Now it is time to build our store. We will walk you through some of the aspects of page creation. We will begin by discussing templates and themes.
Google Sites allows users to build a website in the cloud using just a web browser. The site editor as well as all of the content lives in the cloud on Google’s servers. Google Sites is free to Gmail account holders. Sign up for a Gmail account if you do not have one already.
Sites is located under the More menu of your Gmail account. You need to pick a unique site name. One way to make it unique is to add your Gmail username as a prefix or suffix to your site name—e.g., FrostCoolApp or CoolAppFrost.
A site templateA pre-built site with placeholder text, images, and a pre-selected theme. Site templates are the closest thing to an instant website. is a pre-built site with lorem ipsum (Latin gibberish) placeholder text and images. Each page is already laid out. For example the Family template has Family blog, Family calendar, Family map, and so forth. Template users simply swap in their own content.
Site templates are provided for different types of applications such as a classroom or small business. While some of the templates are pretty slick, we will begin with the Blank template in order to learn Google Sites. The Blank template contains only a home page with a simple theme. You add pages to the Blank template as needed.
The themeSimilar to a template but without the placeholder text and images. A theme specifies formatting—layout, colors, and fonts. is similar to a theme in PowerPoint. Every page in the site derives its look and feel, layout, colors, fonts, and so forth from the theme. You must pick a theme in the same family as the Class Store website since your site is part of the store. It is easier to pick a Theme when you create the site but you may change it later by accessing:
More Actions > Manage Site > Themes
<< Return to Site
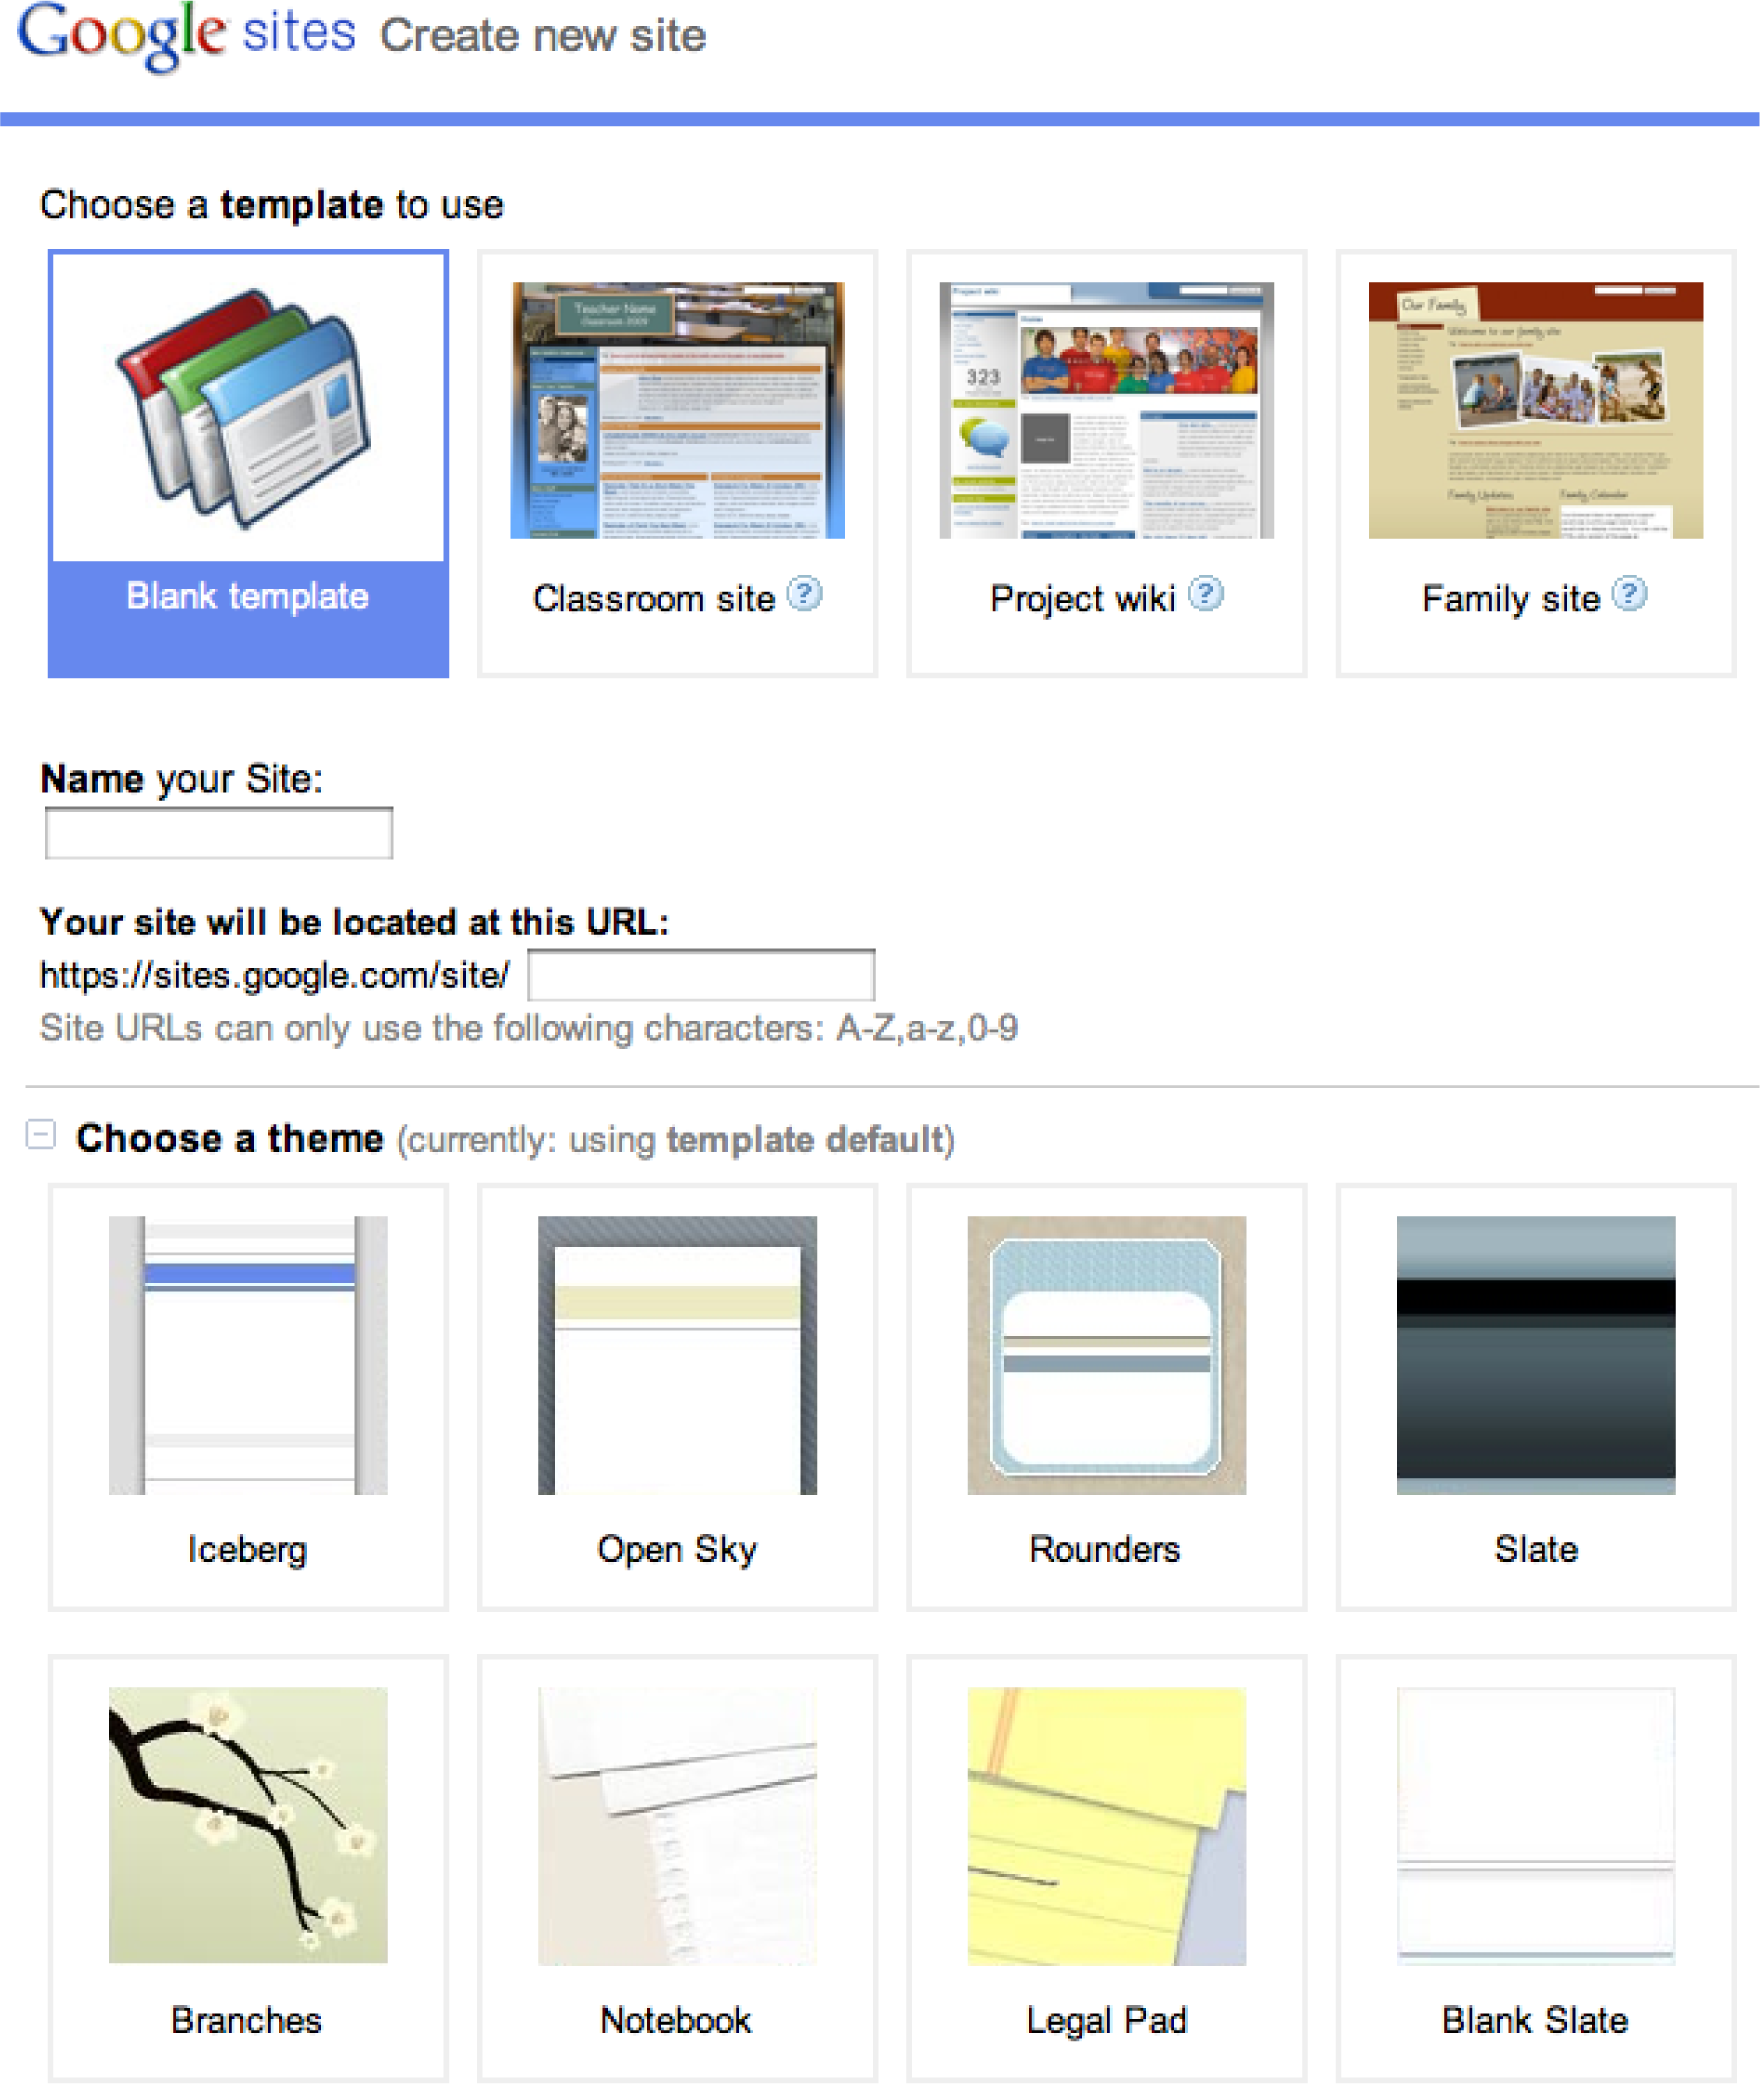
Google Sites opening screen allows you to choose a template, name for your site, and a theme. For our purposes we will stick with the Blank template so that we learn to build a site from scratch.
The built in templates and themes are a good start. However, you will want to control the look and feel of the site to match your corporate standards and the brand.
While the theme is a good start, you may want to tweak the theme on your site much as you might modify the Master Slide in PowerPoint. Modify items such as the Header and Sidebar, which show on every page. Modify background colors and fonts for the different regions of the page if necessary.
More Actions > Manage Site
> Site Settings > General > Site Name .... > Save Changes
> Site Appearance > Site Layout ..... > Save Changes
> Site Appearance > Colors and Fonts
<< Return to Site
When working with colors and fonts it is helpful to understand that a web page is made up of a number of layersWebpage elements that lie on top of one another to create a layered look on the page. stacked on top of one another. Here is the order of the layers beginning with the Page Background on the bottom.
Google Sites was constructed to support workgroup collaboration. Therefore it has some interactive prebuilt page templates (Announcements, File Cabinet, and List). You will probably stick with the simple Web Page templateAn unfortunate reuse of the word template—page template refers to whether or not a given page will have collaboration elements on it—e.g., allowing users to post comments on the page. By contrast, the site template described earlier refers to the layout and pages of the entire site. for most pages. Unfortunately, even this template sometimes allows user to attach files and post comments to individual pages. You will have to turn this feature off as described below.
Select template for page. More Actions > Change Page Template
Eliminate user attachments and comments
In edit mode the content areaThe portion of the page where you write your content. You can specify layouts for each content area—e.g., a three column layout. of each page can be edited. In our experience the layout is best controlled by inserting tables to contain the content.
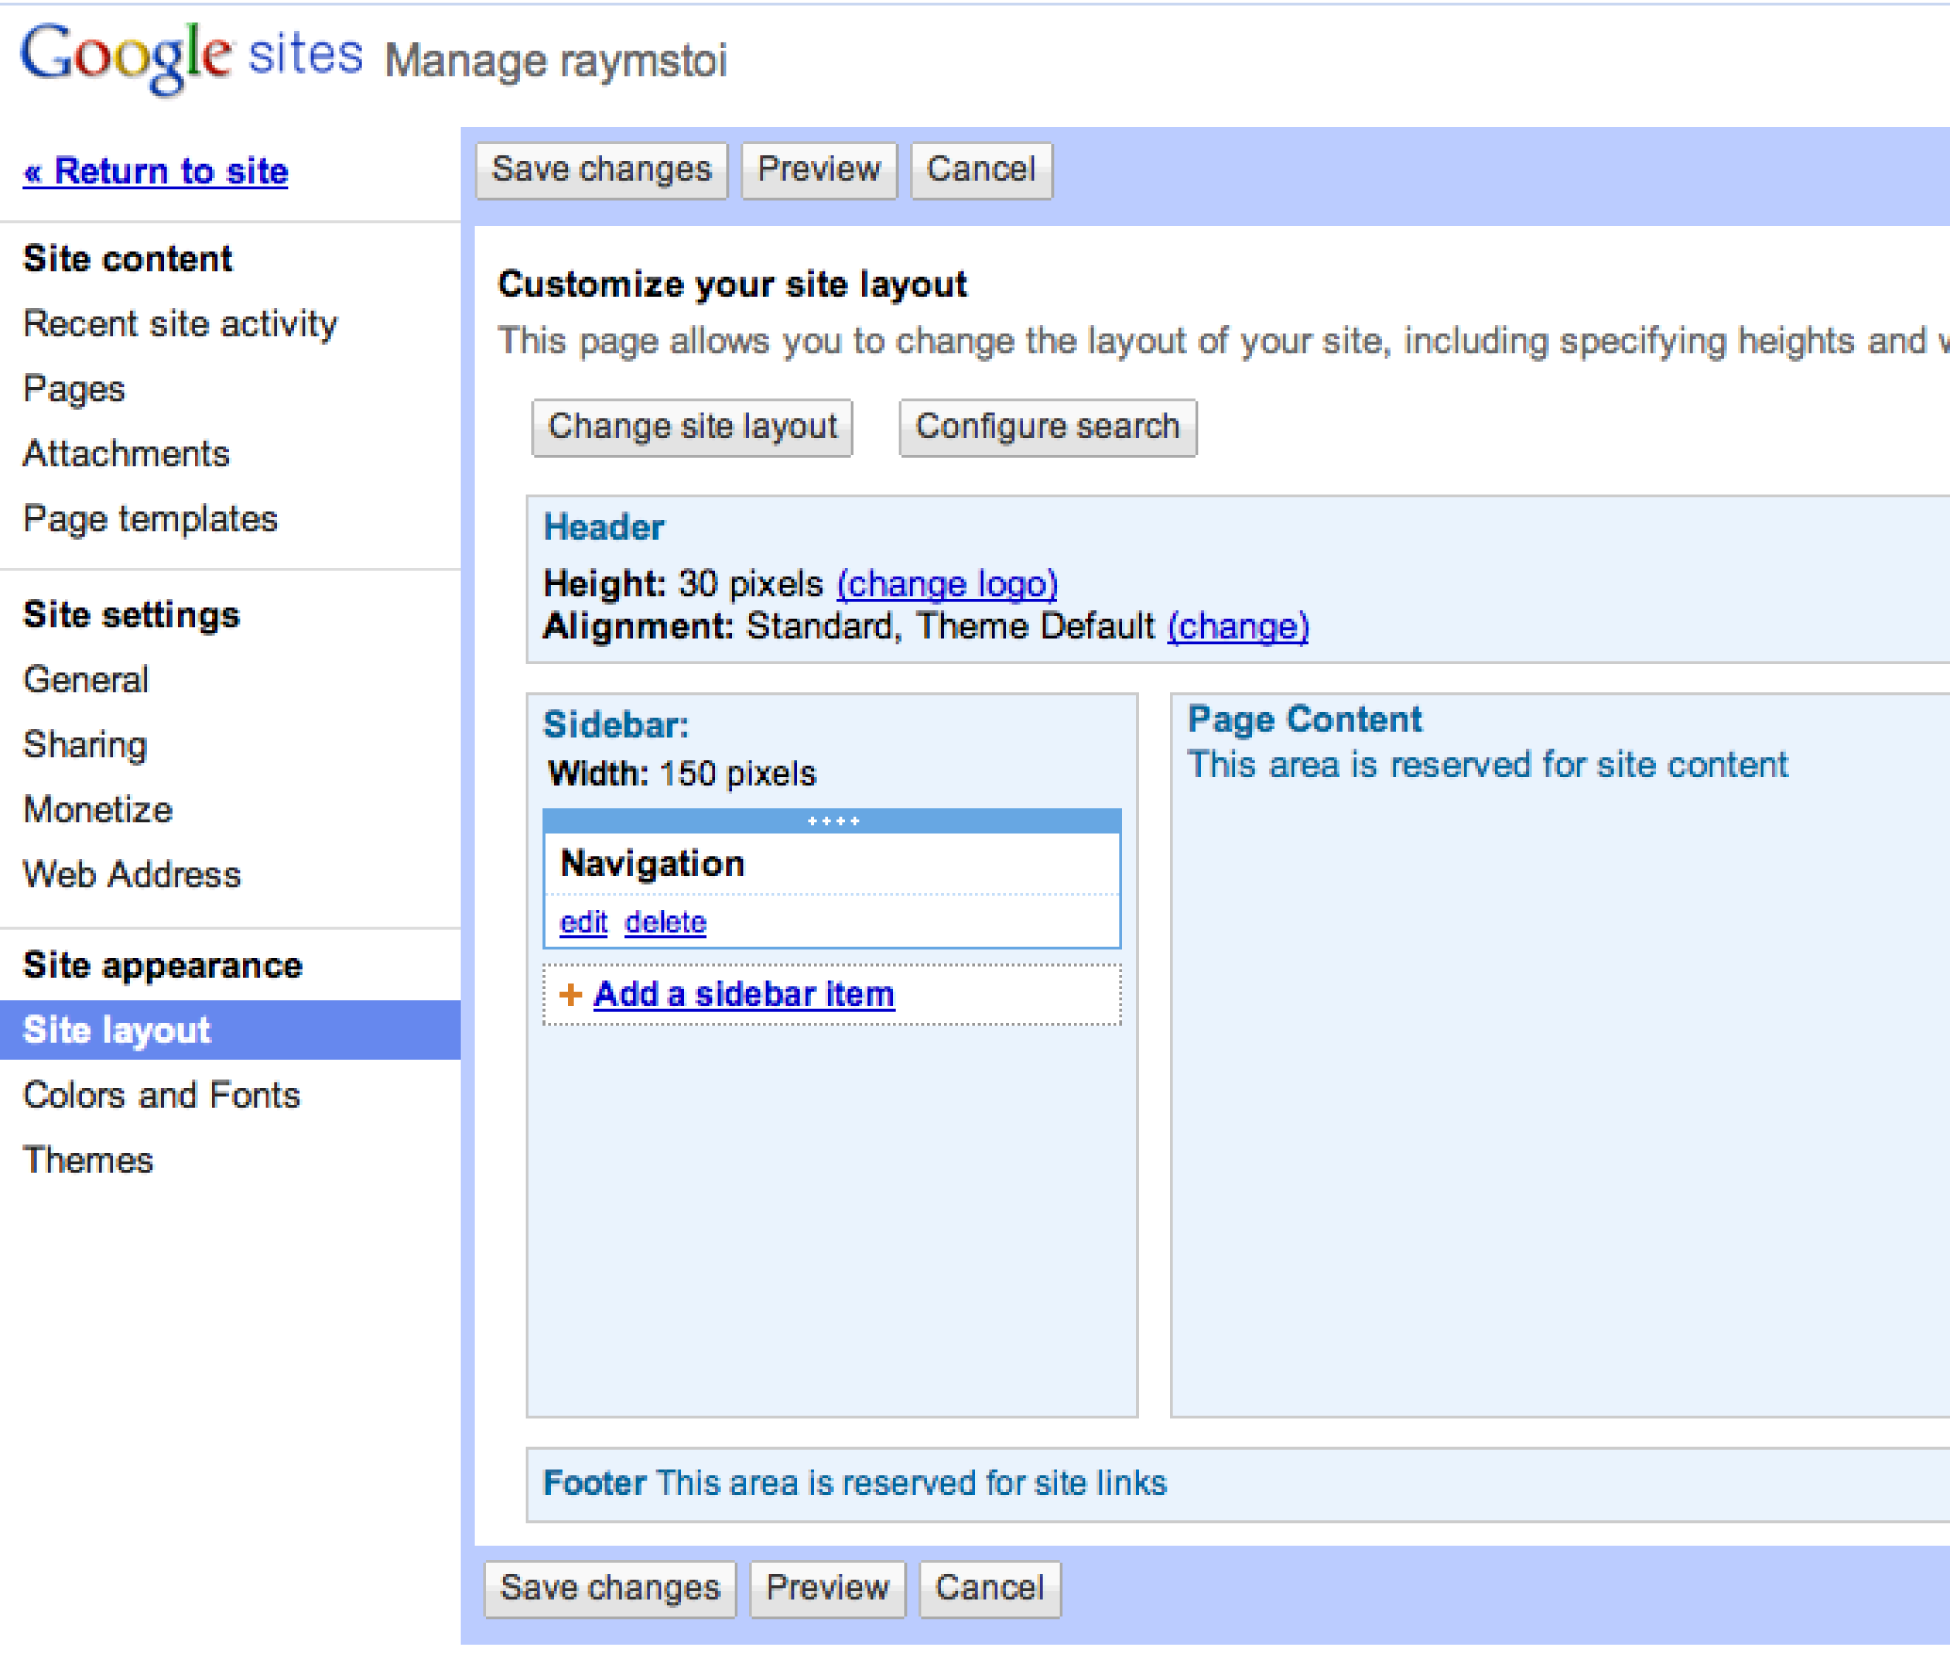
The Manage Site menu has powerful options that control the look and feel of the site. Changes made from this menu affect every page in the site.
Add text to the pages. Be consistent on formatting throughout site. Choose appropriate headings styles. Choose appropriate font sizes if necessary.
Before you can add images you need to save them and prepare a place on the page to receive the images. When using images from your iPhone app you can save them in two ways. You can right click on the image and save it as a PNG file. (You may have to group it first). Alternatively, you can take screen shots of your app.
To prepare the page to receive images, insert a table to receive the images. Then Insert > Image. Resize and align images in their table cells as necessary.
GadgetsMini services that exist in the cloud and can be snapped into your webpage. For example, you can include a weather gadget. can add tremendous functionality to a page. We will use a gadget that captures customer information for customers who sign up for product updates. The gadget is a form that saves to a Google Docs spreadsheet. Google Docs is yet another free Google service that allows you to store and collaborate on documents in the cloud. You access Google Docs by clicking on the Documents link at the top of your Gmail account. Create and save a Form in Google Docs. Documents > Create > Form. Then insert the Form in your web page. Edit Page > Insert > Spreadsheet Form. To test, try visiting the page and filling out the form with some test data. Then return to Google Docs to view the spreadsheet of customers.
There are many other gadgets available from the Edit Page menu including the ability to embed YouTube videos.
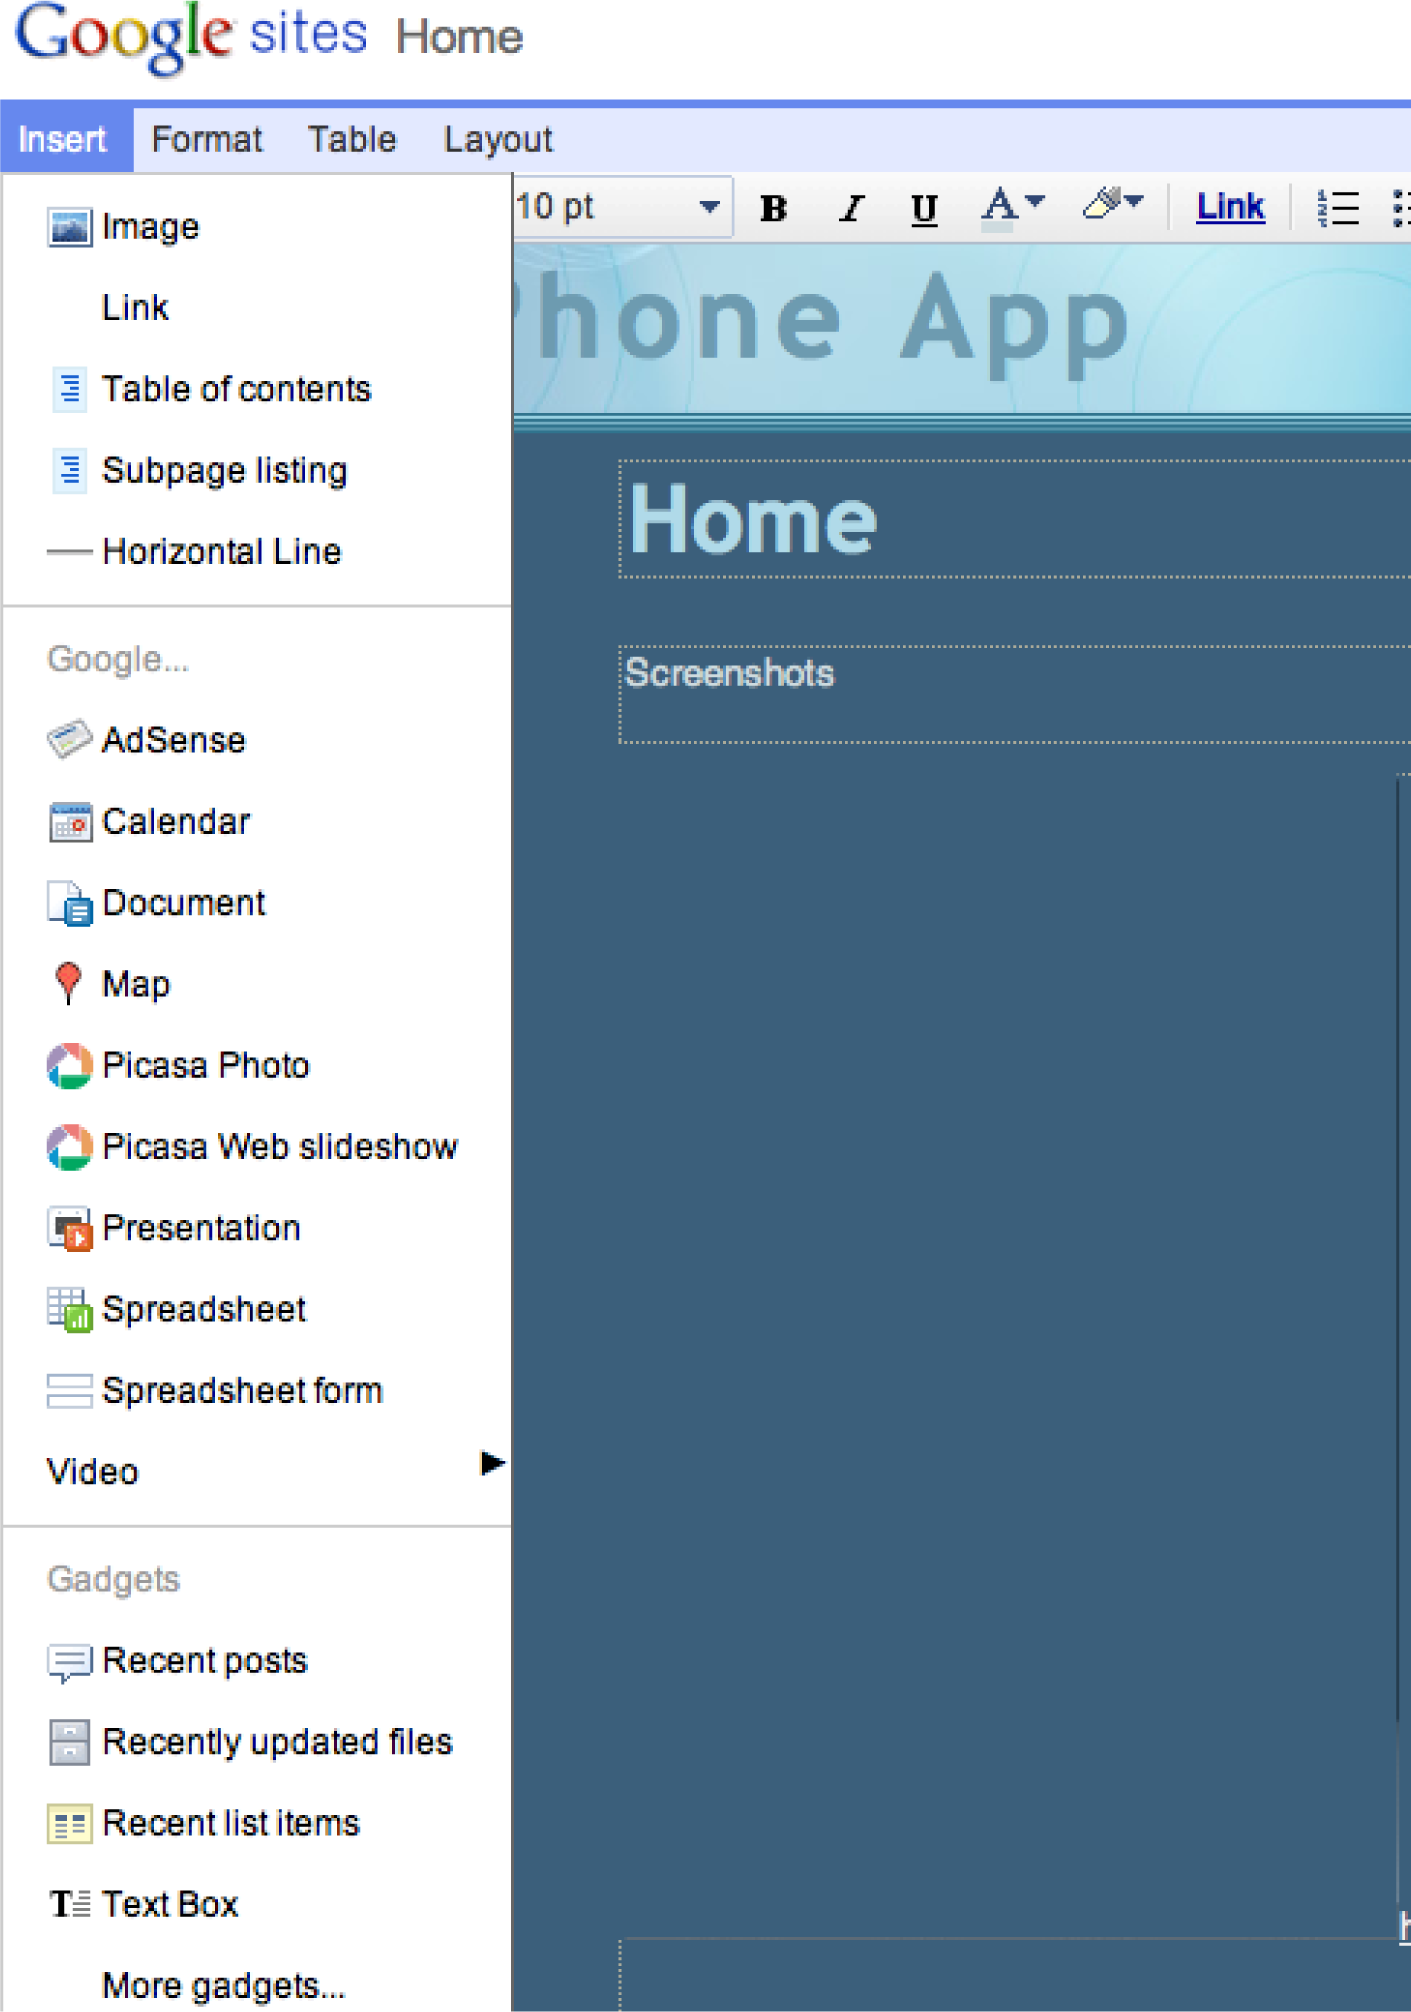
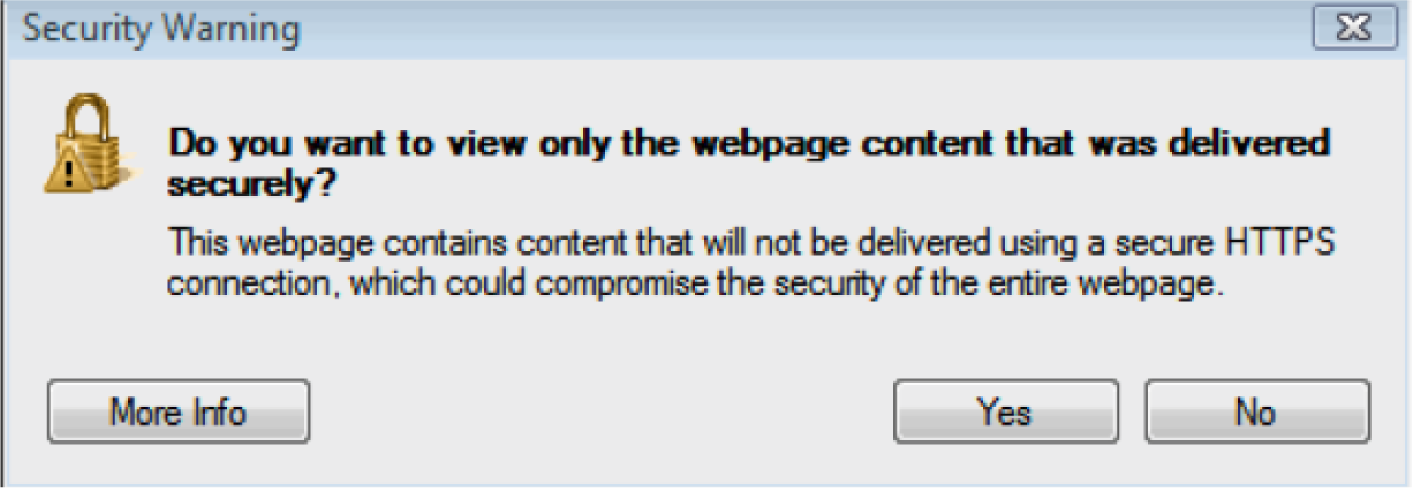
The Insert menu is used to insert images and gadgets. If you get the following error message when inserting a gadget answer NO, otherwise you get only part of the gadget—the part that can be delivered securely.
Even our simple store must collect and display data from a database. We collect data about each app—what it is called, its description, and the link to the student page. We also collect data about each sale—who purchased what and when.
Every time you register on a website, your registration information is stored in a database. Similarly, when you make an online purchase the information is stored in a database. If you play online games, your scores are stored in a database. Websites constantly capture customer data in order to improve their services.
A databaseA collection of one or more related tables of data stored in rows and columns. is a collection of one or more related tables of data stored in rows and columns. By this definition even a spreadsheet is a simple database. However, many business databases consist of multiple files that are interrelated. Databases may be searched, sorted, and summarized to display information. Most businesses would not function without databases of information. For example, imagine a bank trying to function without its database of customer and account information.
Information is usually entered into a database using a formA user-friendly way to get information into a database.. Each form normally corresponds to a single record or row in the database. Each field in the form normally corresponds to a single column or cell in that record. The form helps ensure that correct information is entered. Drop down menus in particular help ensure that users do not type in gibberish.
Just a short time ago, only professional programmers could save website information to a database. There are now tools that make this functionality easily accessible. The simplest example of database integrationThe ability to capture and store information gathered from a form into a database. Database integration also refers to the ability to extract and display information from a database on a website. is to save information to a one table database. The simplest one table database is a spreadsheet.
Information is extracted from databases in the form of reports. The simplest report is a listing of all the records in the database. However, most reports summarize the information in a way that is helpful to business managers so that they can make data driven decisions. For example, a report might show total sales by product allowing managers to adjust inventory to meet demand.
One very interesting use of database information is to create custom web pages. For example, imagine you have purchased multiple items from Amazon.com. Amazon keeps track of your purchases and those of millions of other customers. By looking for patterns of buying behavior in its database, Amazon is able to suggest products you might like based on the buying behavior of customers who match your purchase profile.
While the site registration and sale forms are created by the professor, we would like you to have some experience with data integration. Therefore, you will make a form whereby users can register with your site to receive product update information even without making a purchase.
Because the form includes the customer’s email address, the information is a valuable resource for future mass mailings. If used judiciously, such mass mailings are appreciated by customers; if overused they are considered spam.
Google Docs lets you create a form to accept customer information and then stores the information in a spreadsheet. In other words, when you create a form, you get both a form and a spreadsheet automatically.
Start Google Docs
Create New > Form
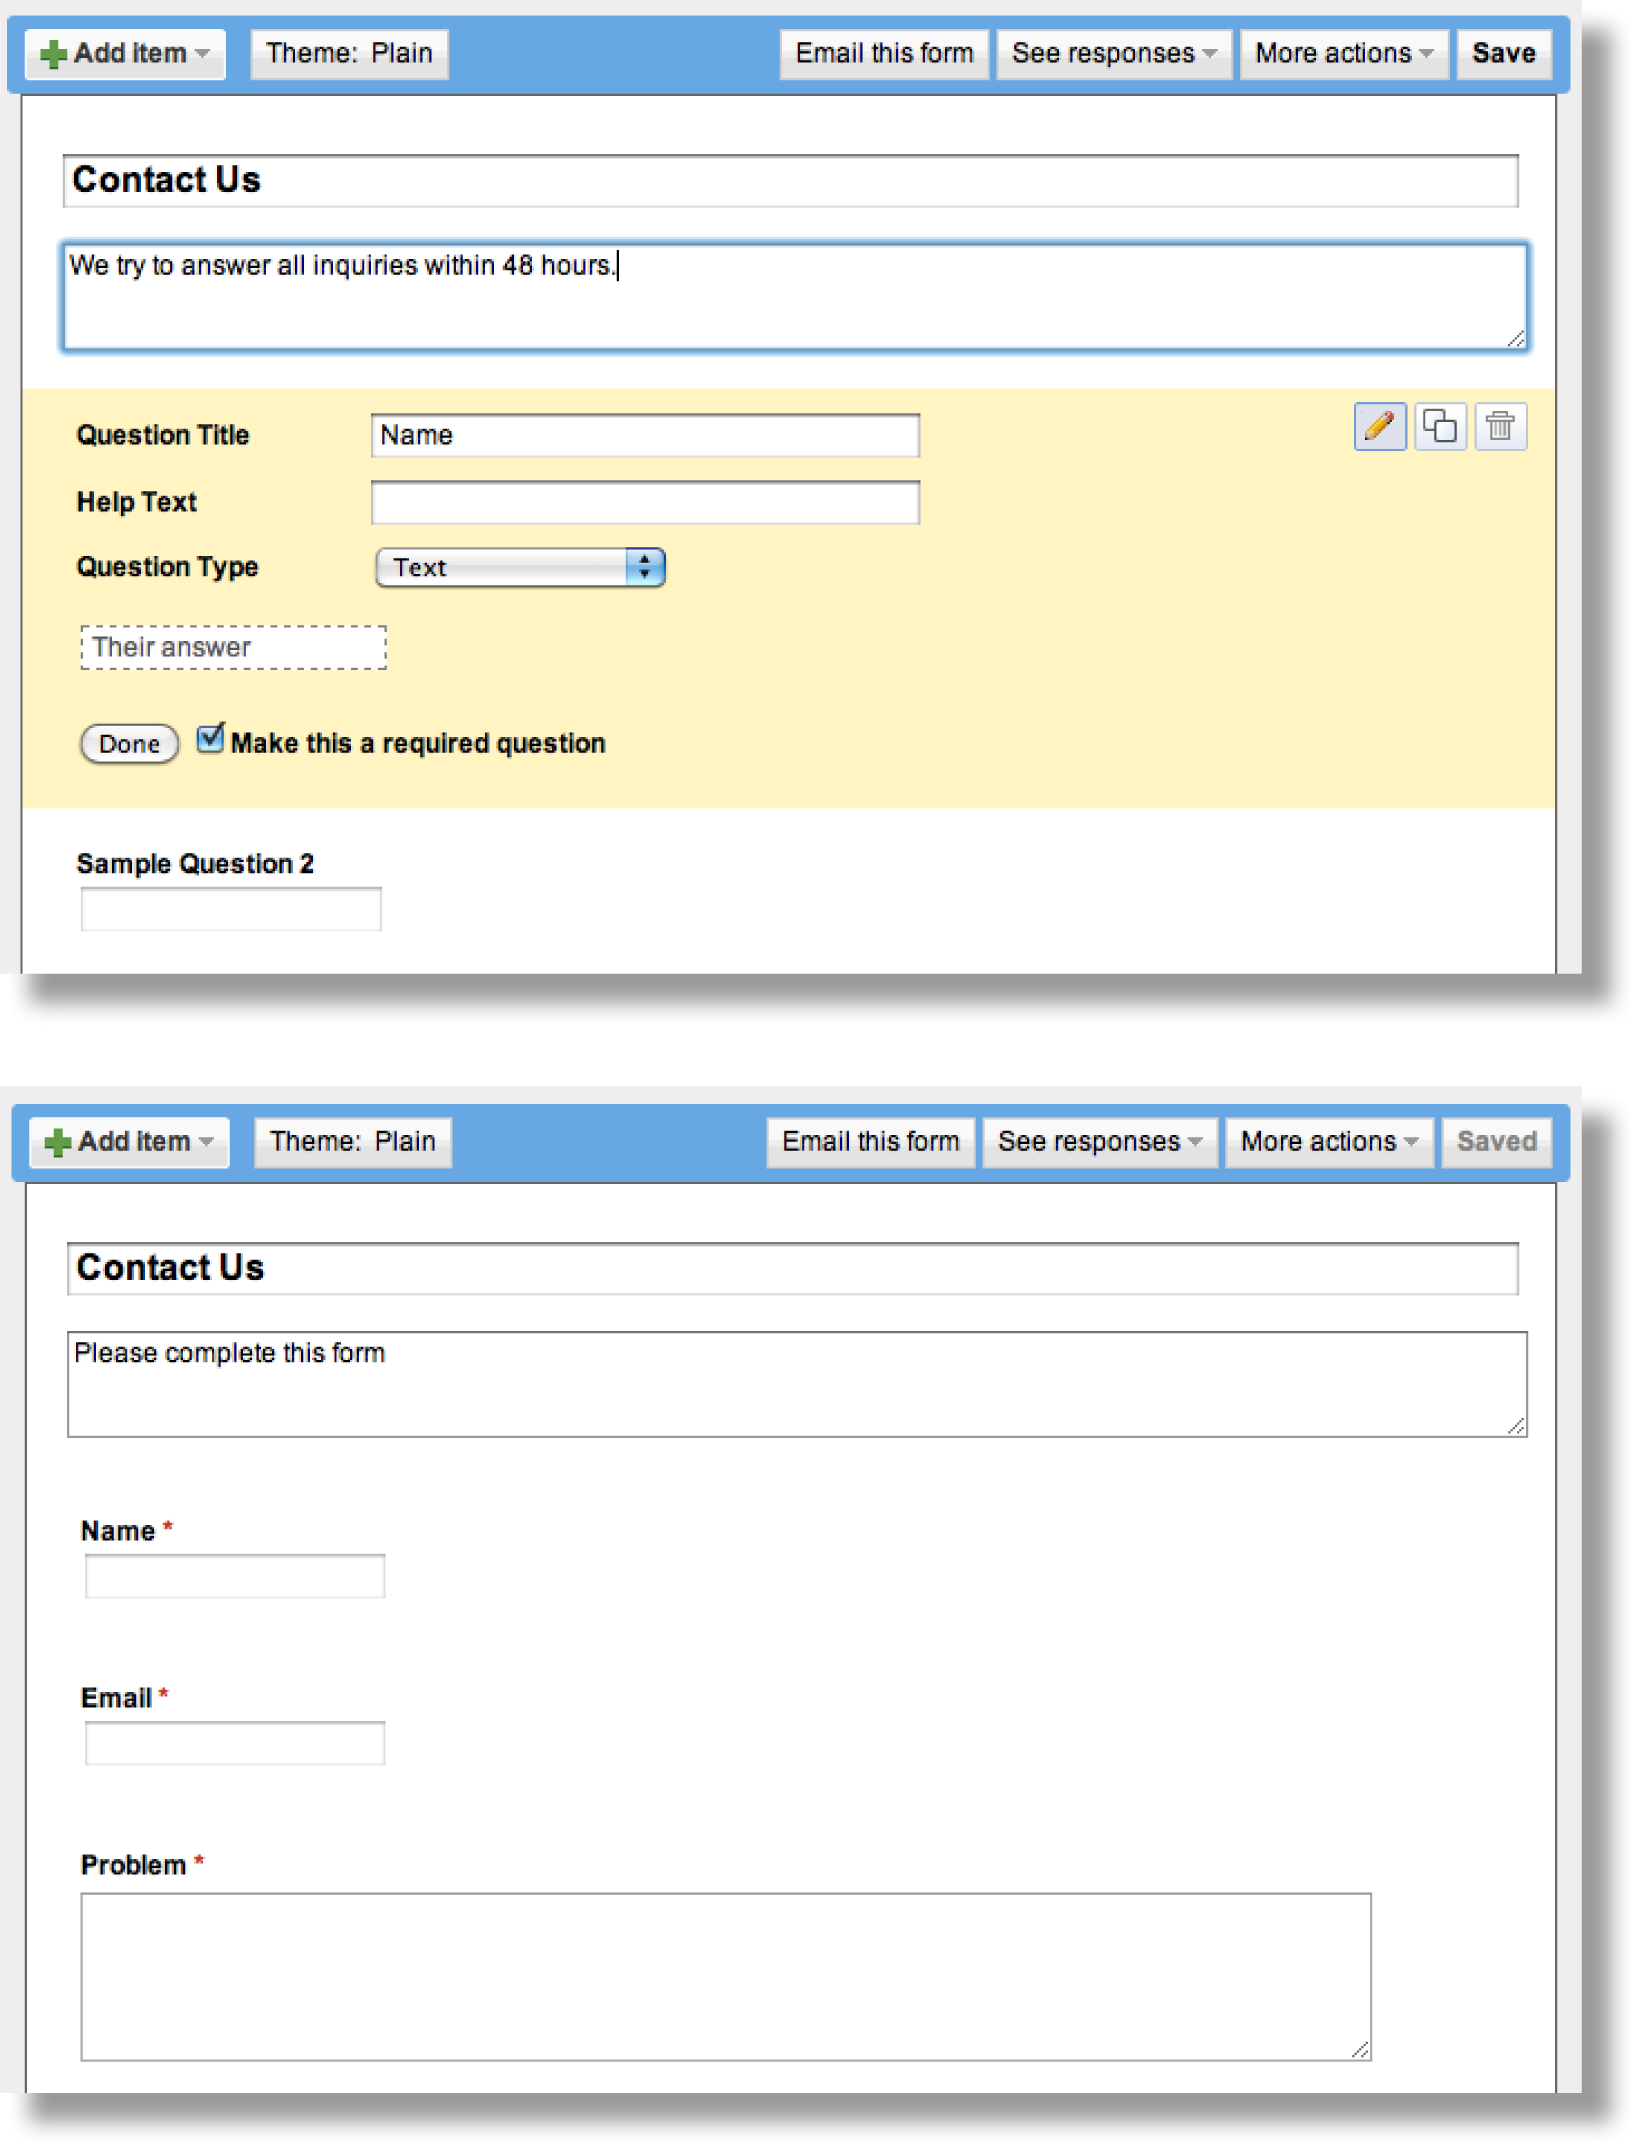
Complete the form so that it looks similar to the form below. After completing each field you need to click Done. The first two fields are already on the form. To get the third field, check Add item. Then save the form.
Add the form to your web page from the same menu that you use to insert gadgets, calendars, and so forth. Then exit edit mode and practice filling in the form.
Return to Google Docs. You will see a spreadsheet listed with the same name as your form. Open the spreadsheet to view the captured data.
Google Docs allows you to develop an input form, which you can then embed in a page of your website. Data entered into the form by users is automatically saved in a Google spreadsheet. Each user record becomes a new row in the spreadsheet.
The following techniques, found in the Google section of the Cloud Computing software reference, may be useful in completing the assignments for this chapter: Overview Map of Interface • Share a Document • Create a Form • Background Color • Copyright in Sidebar • Page Layout • Content-Delete “Comments and Attachments” and the Default Page • Title • Page-Create New • Gadgets-Insert • Logo-Insert
In this assignment you create a working website prototype to help market your app. Your site will become part of the class app store.
Setup
Sign on to your Gmail account. Select Sites from the More menu.
Content and Style
Homepage
About Us
Blog
Extra Credit (if you make it work)
Deliverables
Electronic submission: Post a WORKING link to your website. Paper submission: Create a printout of each screen of your site.
Shopping
After everyone’s site is posted the professor will open the store for shopping. At that point you need to buy 10 apps of your choice.